For the fourth year in a row, the internet sales market has been growing at an accelerated pace and more and more small and medium-sized businesses are moving into web sales, challenging the big players. But at a certain stage, businesses often hit a "ceiling", reaching a sales plateau or even start losing customers without realizing the reason.
The reasons can range from problems on the UX side or backend to an imperfect marketing strategy. But how do you know exactly what you need to pay attention to?
Google Analytics 4 (GA4) always comes to the rescue, which provides all the functionality for reports of any flexibility. GA4 allows you to track e-commerce funnels, which is an important part of successful marketing and allows businesses to see customer interactions and identify barriers to purchase.
GA4 works most effectively in conjunction with Google Tag Manager (GTM), this combination provides more powerful and flexible tools for in-depth analysis and optimization of online stores. GTM is a tool for professional customization of e-commerce funnel tracking tags and may seem complicated in its customization, but this is only at first glance.
In this article, we will explore the benefits of working with GTM and learn step by step how to customize e-commerce funnel events including product page views, add to cart, checkout ect.
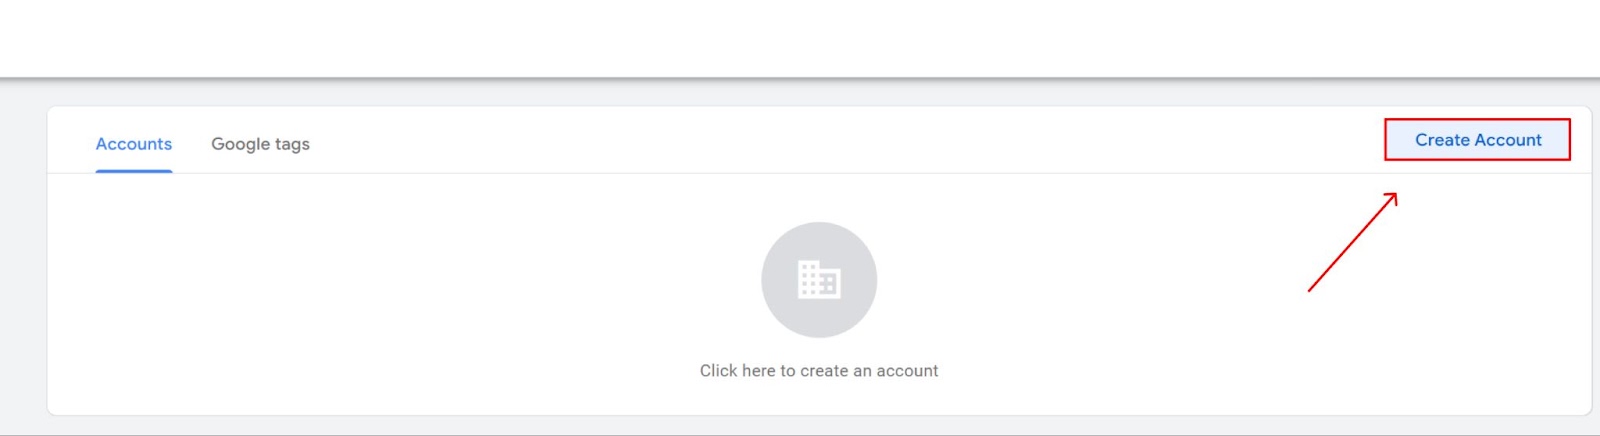
How to create an account and run a container in GTM?
Step 1
You probably already have a GA4 account created but don't have a Google Tag Manager account yet, let's create one!
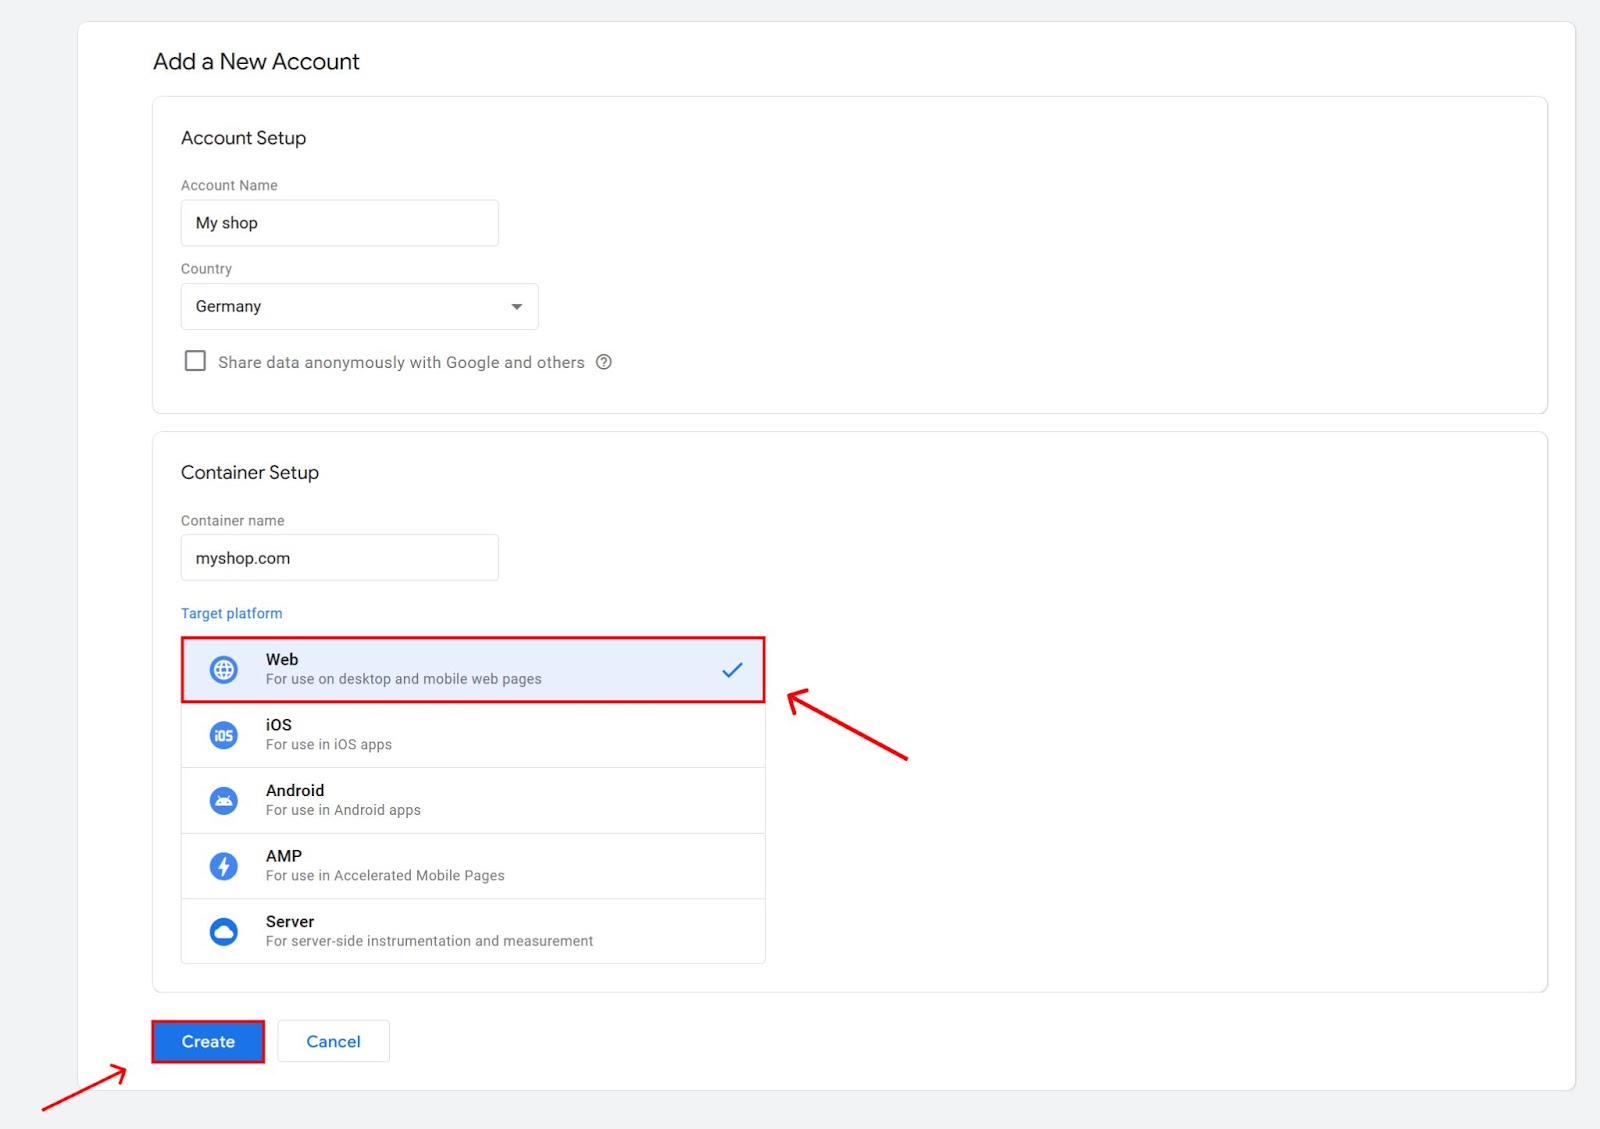
The Google Tag Manager is tied to your Google account, but within it you need to create an account for your business and a web container for your website. Let's do this:
Step 2
After creating the web container, you will be prompted to copy the GTM code and install it manually on your site, which is what we need to do. You only have to copy the first code, the second one you will never need.
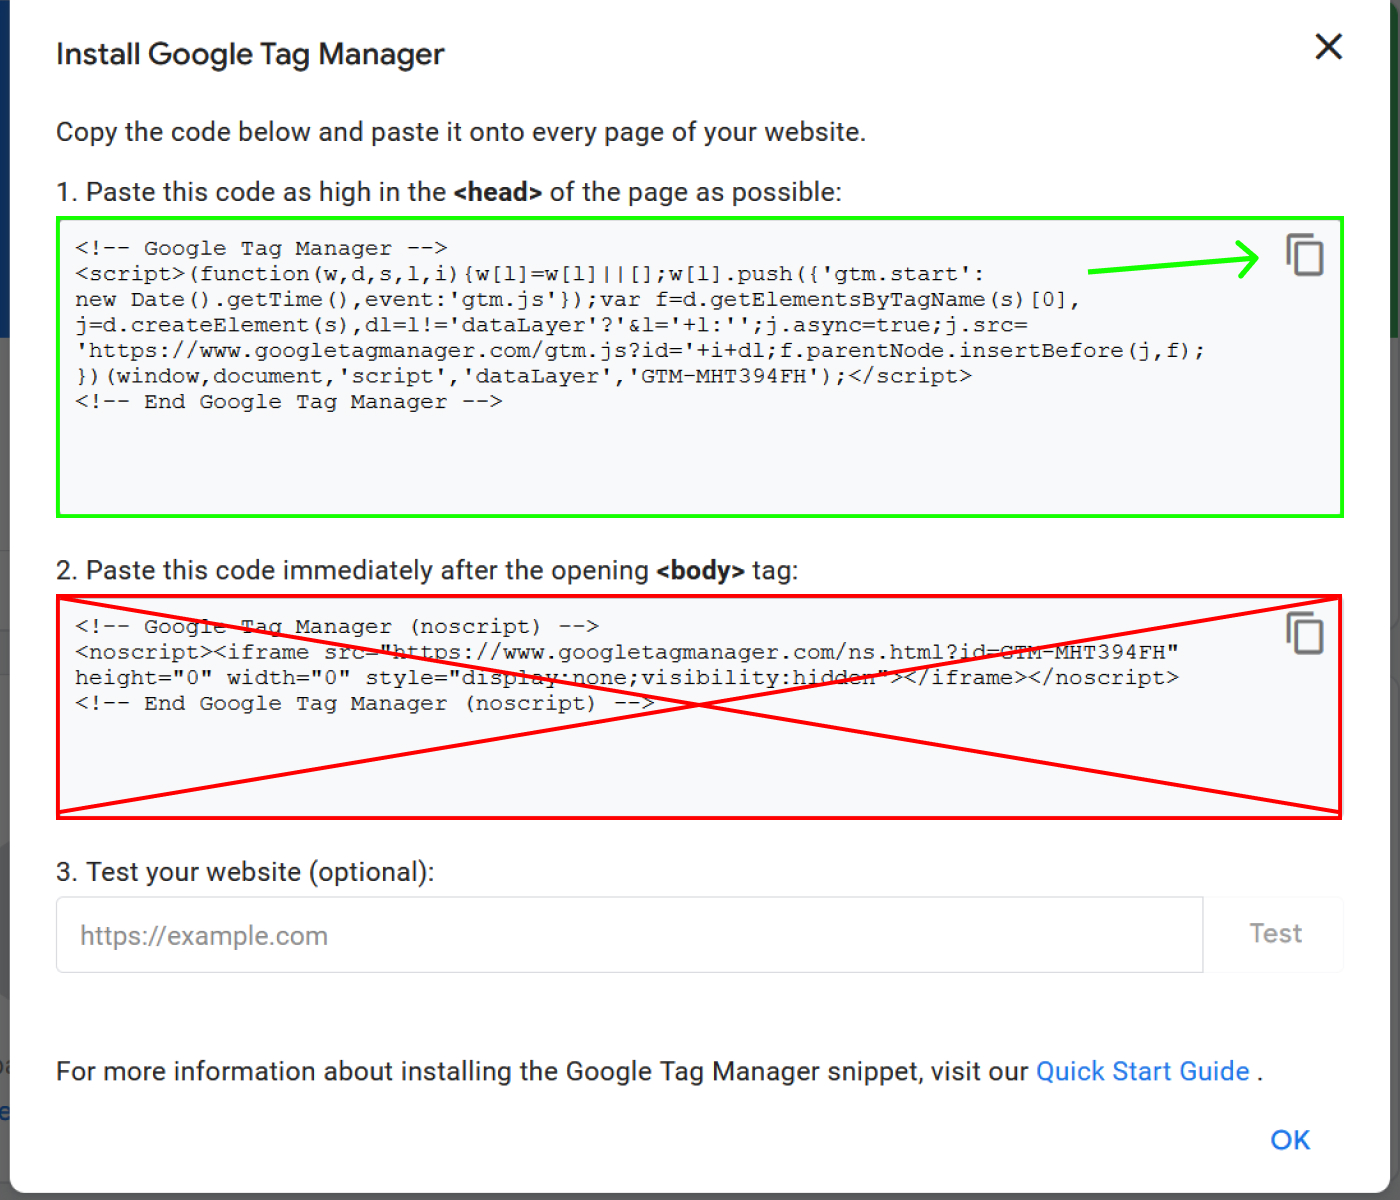
Go to the backend of your website and paste the code inside the <head> container, or ask your developer to do it. If you have already integrated GTM into your website with plugins in the past, make sure to remove this integration, otherwise all events will be duplicated and your statistics will no longer be useful.

Step 3
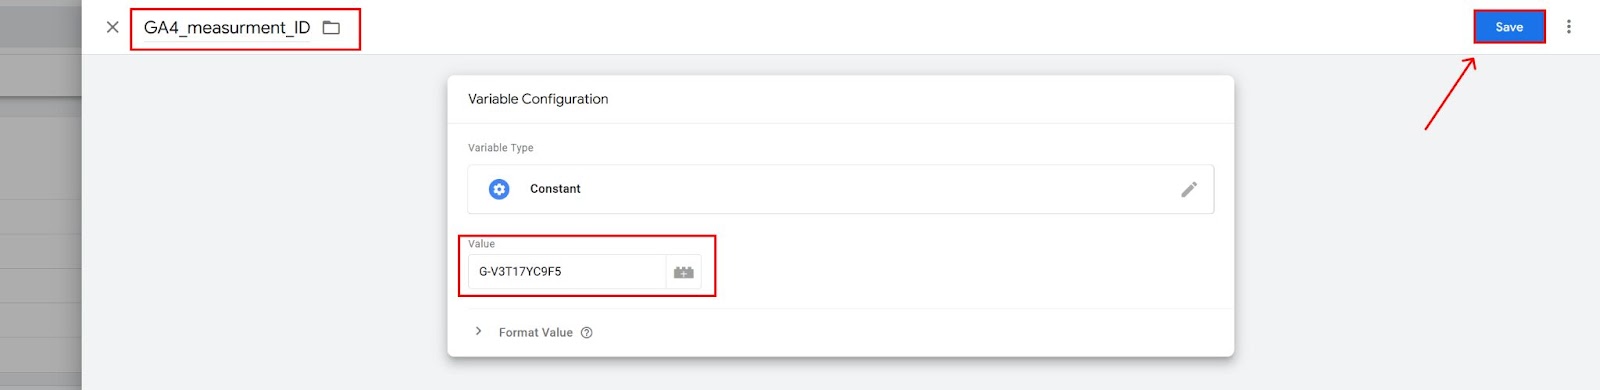
Log into your Google Analytics 4 account, go to Admin - Data streams and copy the code called "Measurement ID".

Step 4
Now you need to add this ID to the GTM variable, as we will be using it many times.
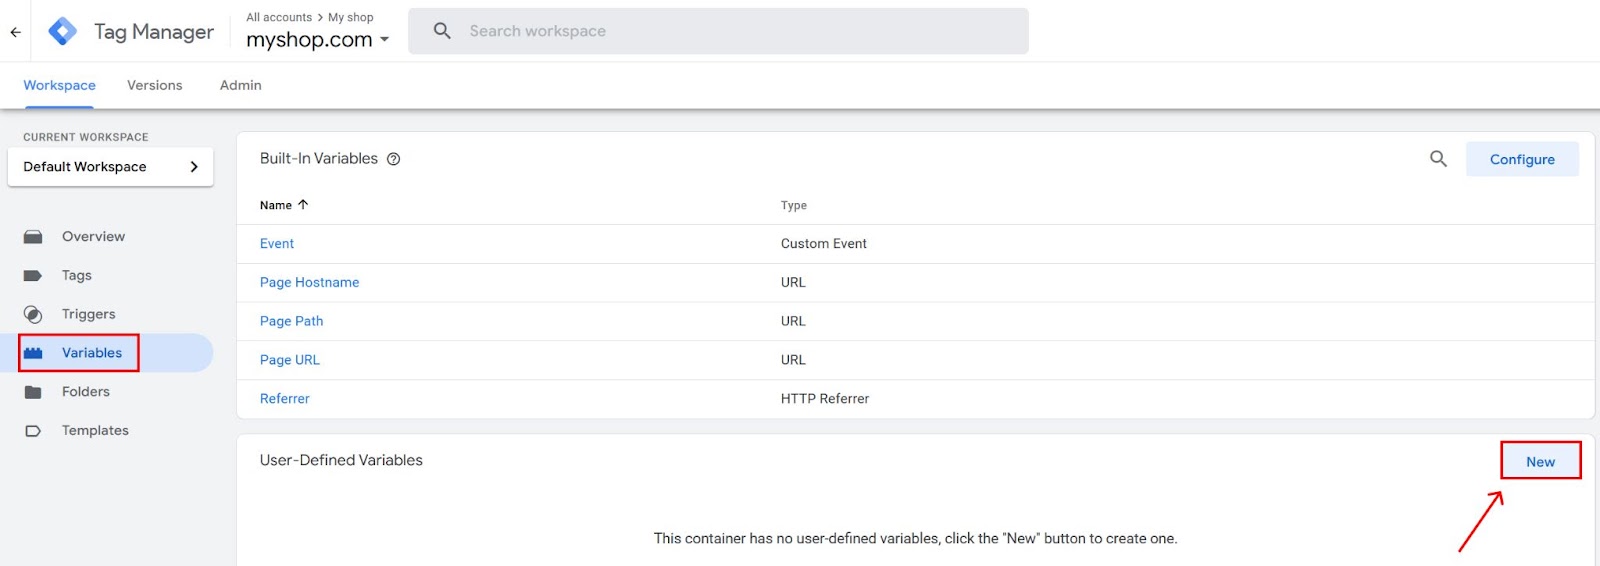
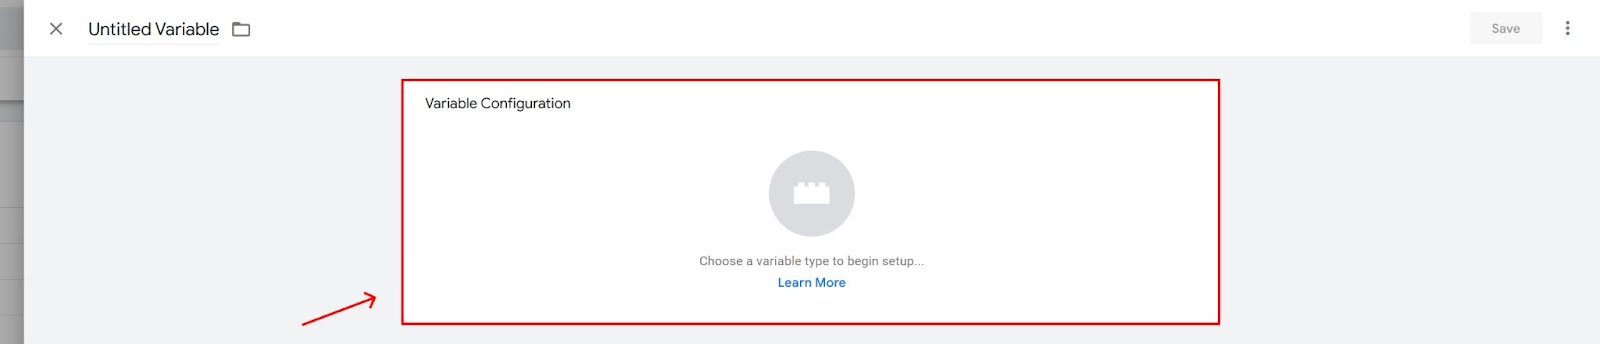
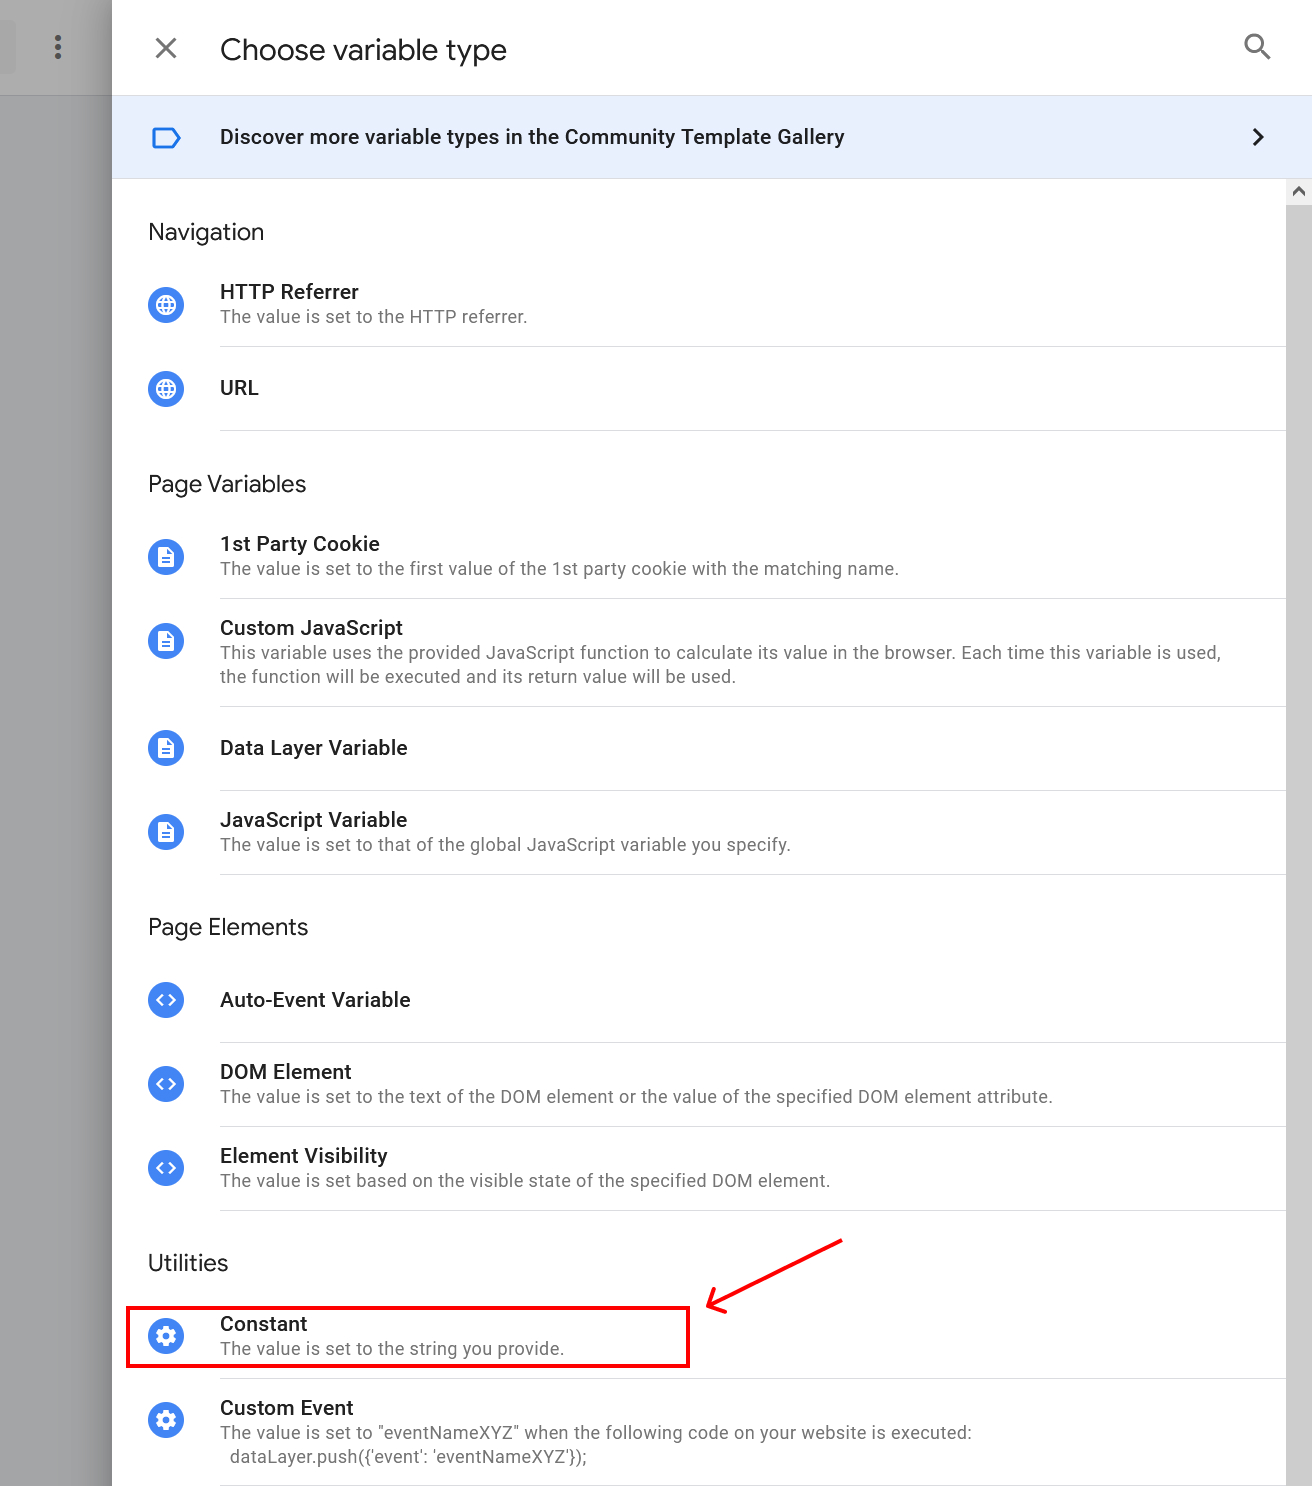
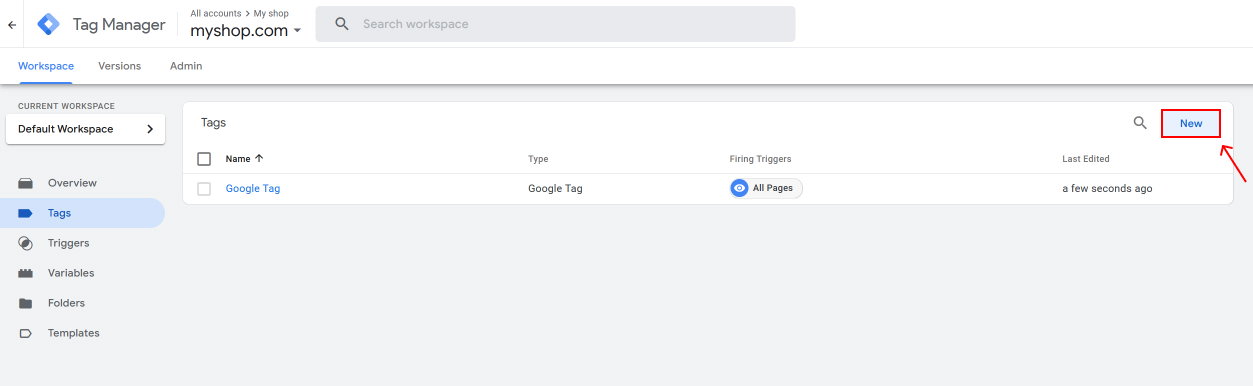
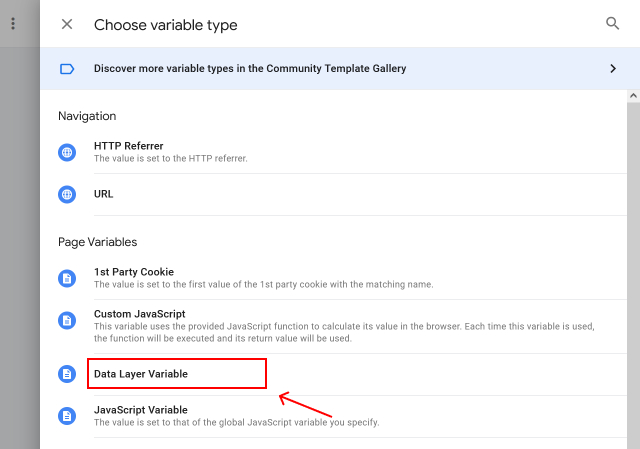
In the web container of your GTM account, go to the Workspace tab and click on Variables. To create a new Variables click on the “New” button and follow the instructions in the screenshots:
Paste the copied measurement ID into the "value" field and save.
Step 5
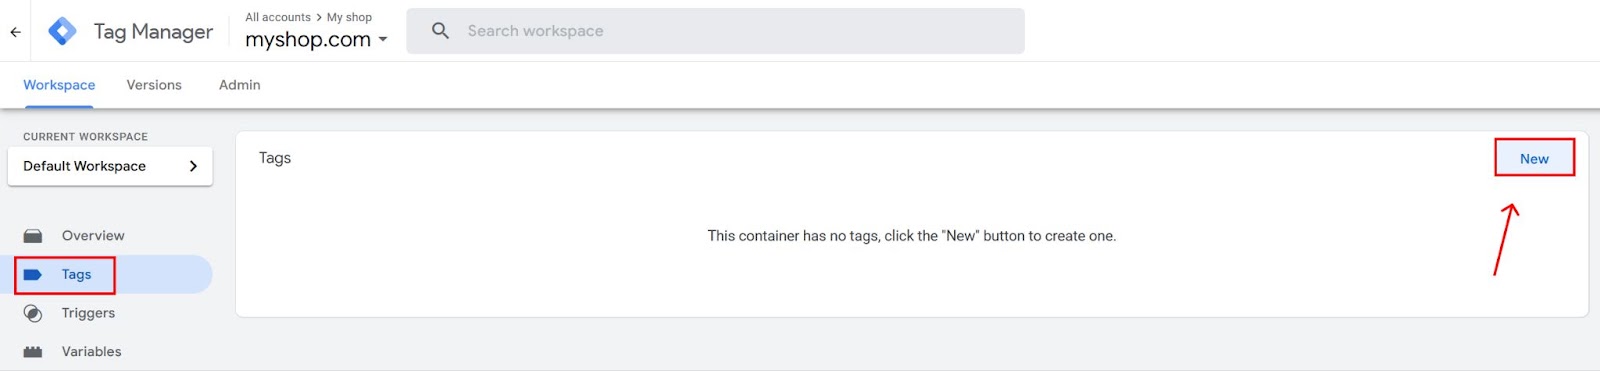
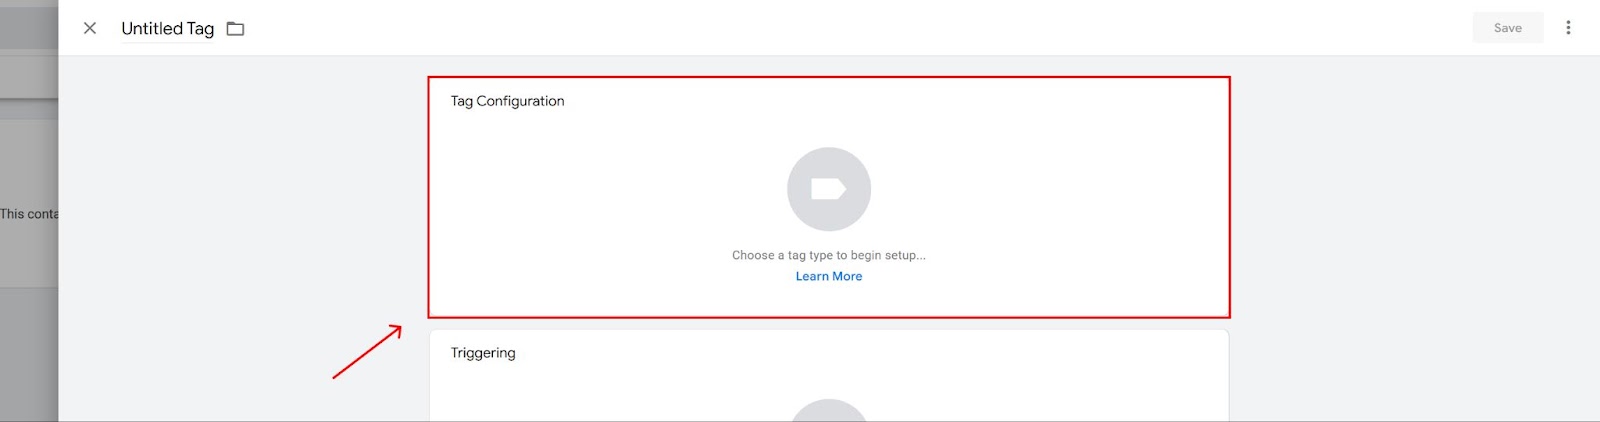
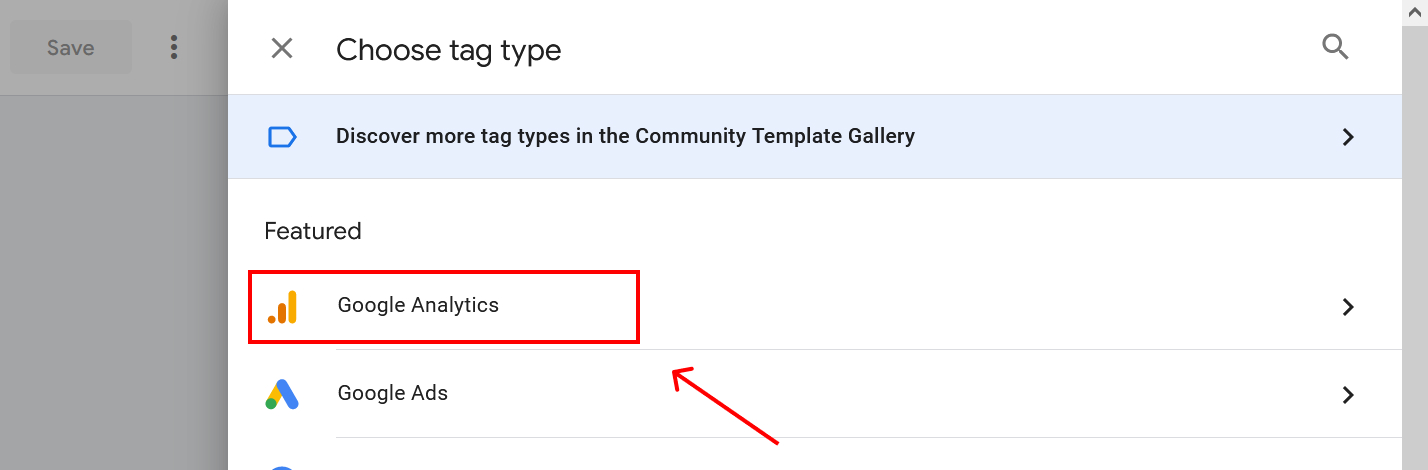
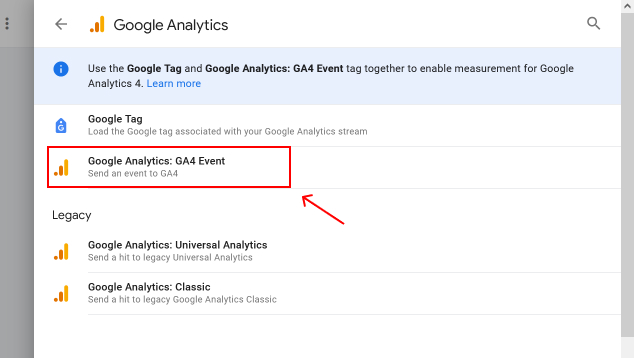
Great! Now let's connect GA4 to your GTM! Go to the Tags section and click on the New button. Then follow the instructions:
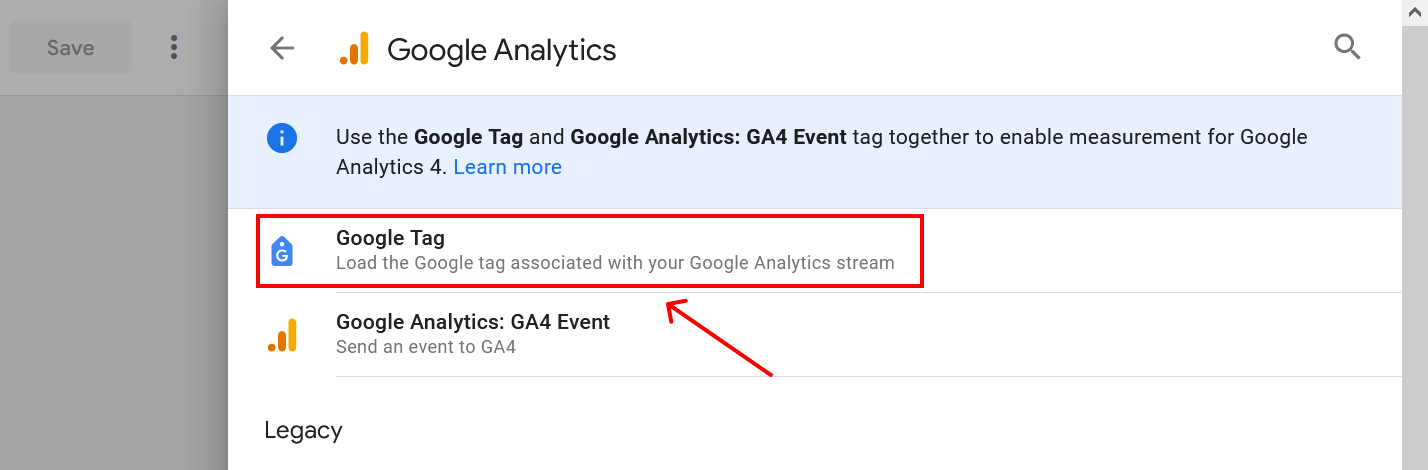


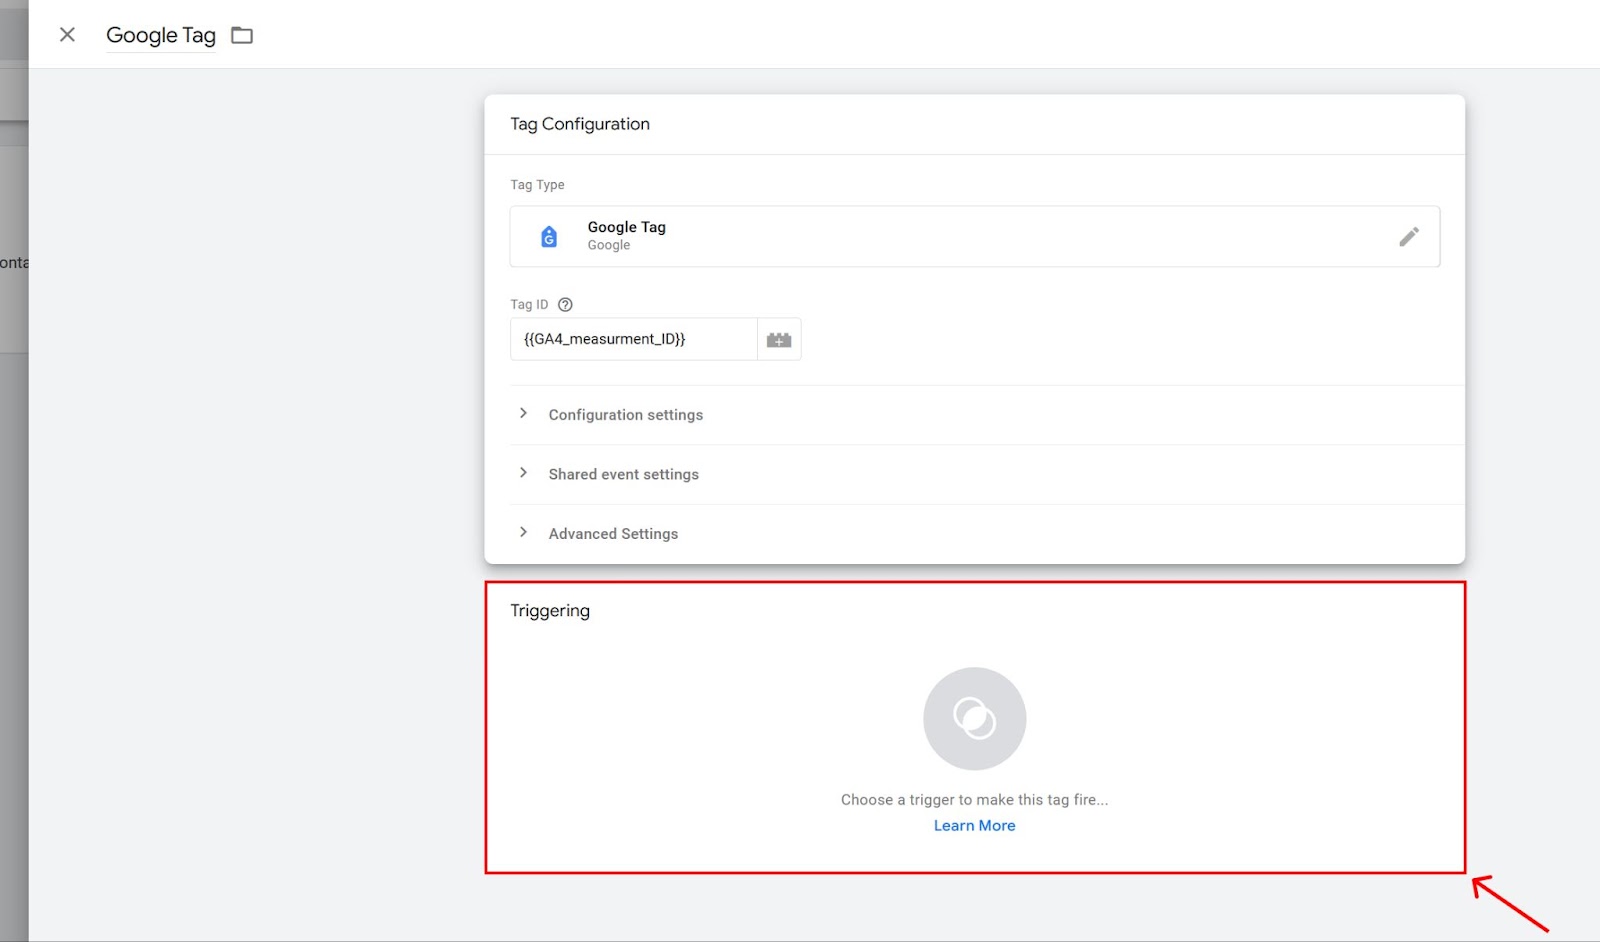

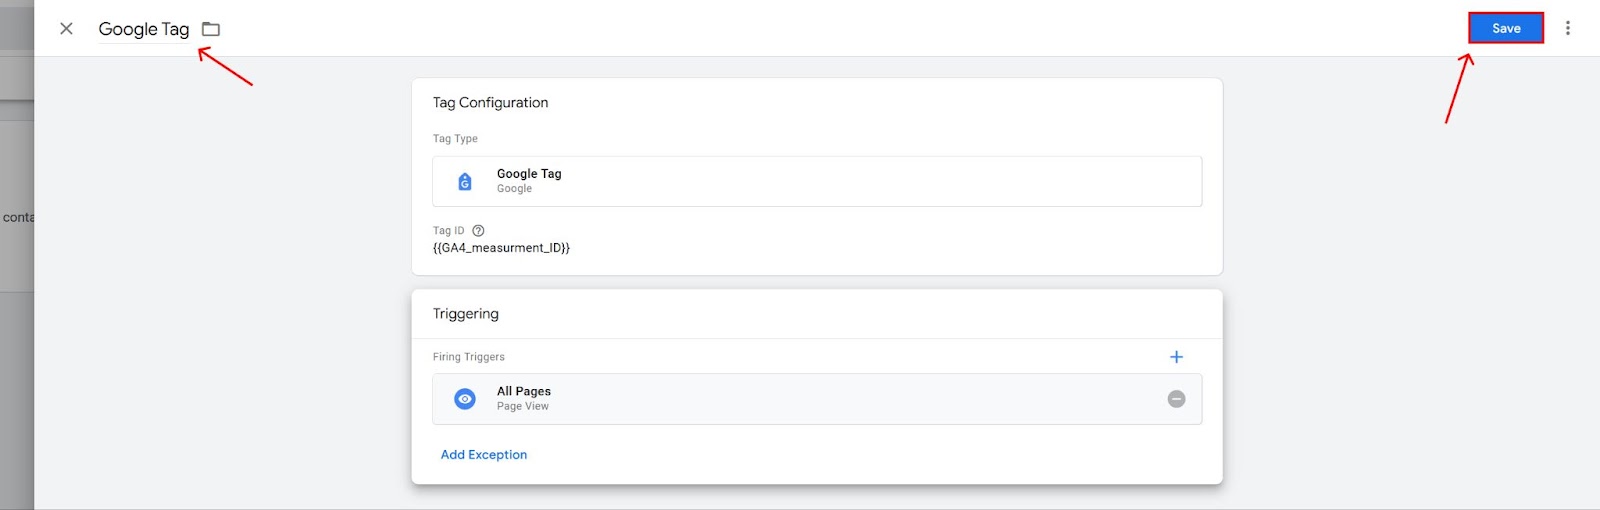
Congratulations, you have connected GA4 to your GTM! This tag will now trigger on every page of your website, sending data to your GA4 account.
How to create and properly configure the “purchase” event?
Now we can start setting up the e-commerce tracking tags of your web shop's e-commerce funnel. Your GA4 will receive analytics related to both the user's actions on your website regarding everything related to the purchase of a product, as well as information about the product itself that the user purchased. This is important for tracking trends, marketing strategies and proper site performance.
A classic e-commerce funnel tag setup includes view_item, add_to_cart, remove_from_cart, view_cart, checkout and purchase tags.
The purchase event is the most important and informative event, advertising optimisation and business strategy is built around this event. This event should be set up first, let's do it!
Step 1
You need to take a complete user journey from loading your homepage to making a purchase on your site. But your site should open through a special GTM mode called Tag Assistant.
First, click on the “Preview” button.
Add your website URL and click on “Сonnect”.
This will open two windows: the first one is the Tag Assistant - an interface that will allow you to see all the important actions you do on your website, the second one is your website where you have to make a purchase.

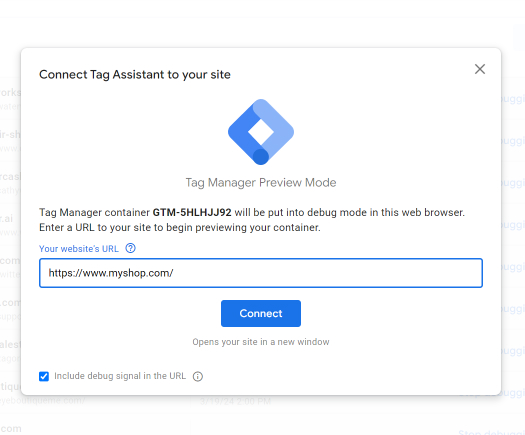
If you have a test purchase mode or a 100% off coupon, now is the time to apply it.
You have to:
- open the product page,
- add an item to the cart,
- open the cart,
- remove the item from there and add it again,
- then you have to checkout and pay for the order.
Your checkpoint is the “thank-you” page.
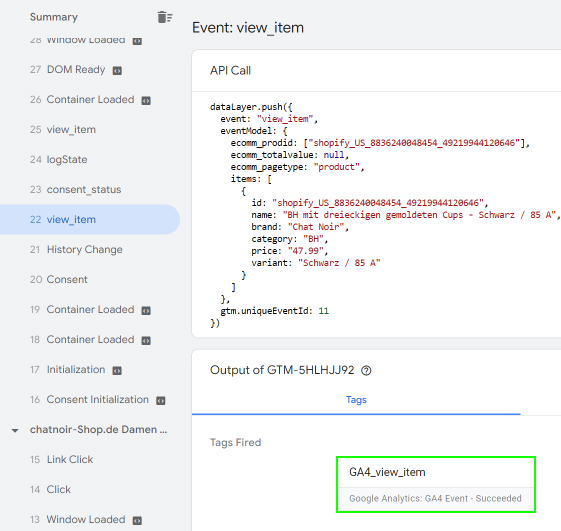
After that, go to Tag Assistance and find all these events in the list. Some of them may be missing (like view_cart) . It depends on the CMS system and if the view_cart or remove_from_cart event is missing, it's not critical. If you are using Shopify, you will most likely not have the checkout event tracked. This is a Shopify specificity that only allows this event to be tracked on a high subscription rate. If you have a custom website and are missing all events, it is due to a missing DataLayer in the code. In this case, you should contact the developers and ask them to implement a DataLayer for these events.
Step 2
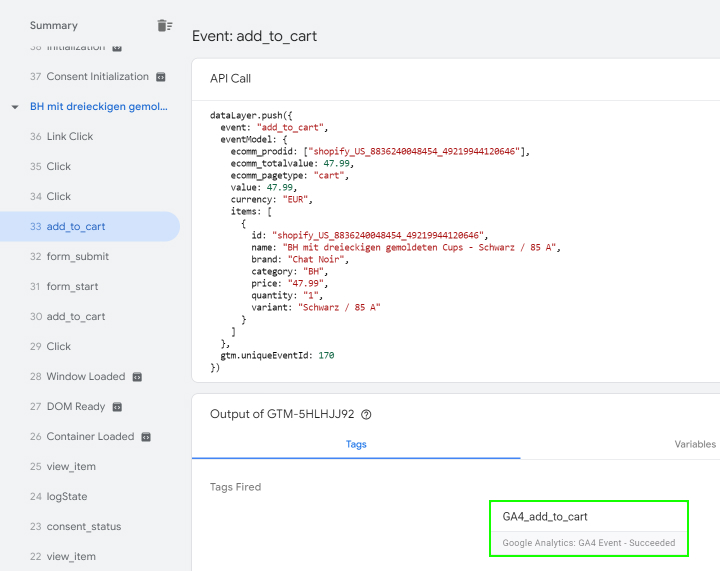
You made a purchase and found this event on Tag Assistance? Excellent, here's what you should see there:

The DataLayer shows the parameters of an item you are interacting with. Let's highlight the most important ones:
- Transaction_id - an unique id of your transaction;
- Value - a final value of the item;
- Shipping - an amount for shipping that was paid;
- Currency - a code of currency that the payment was made with;
- Items - are the general characteristics of item (ID, name, description ect).
These parameters are very important for GA4 e-commerce funnel, you need to pass them correctly along with the tag. Please, don't close this window, we will need it when customizing tags.
Step 3
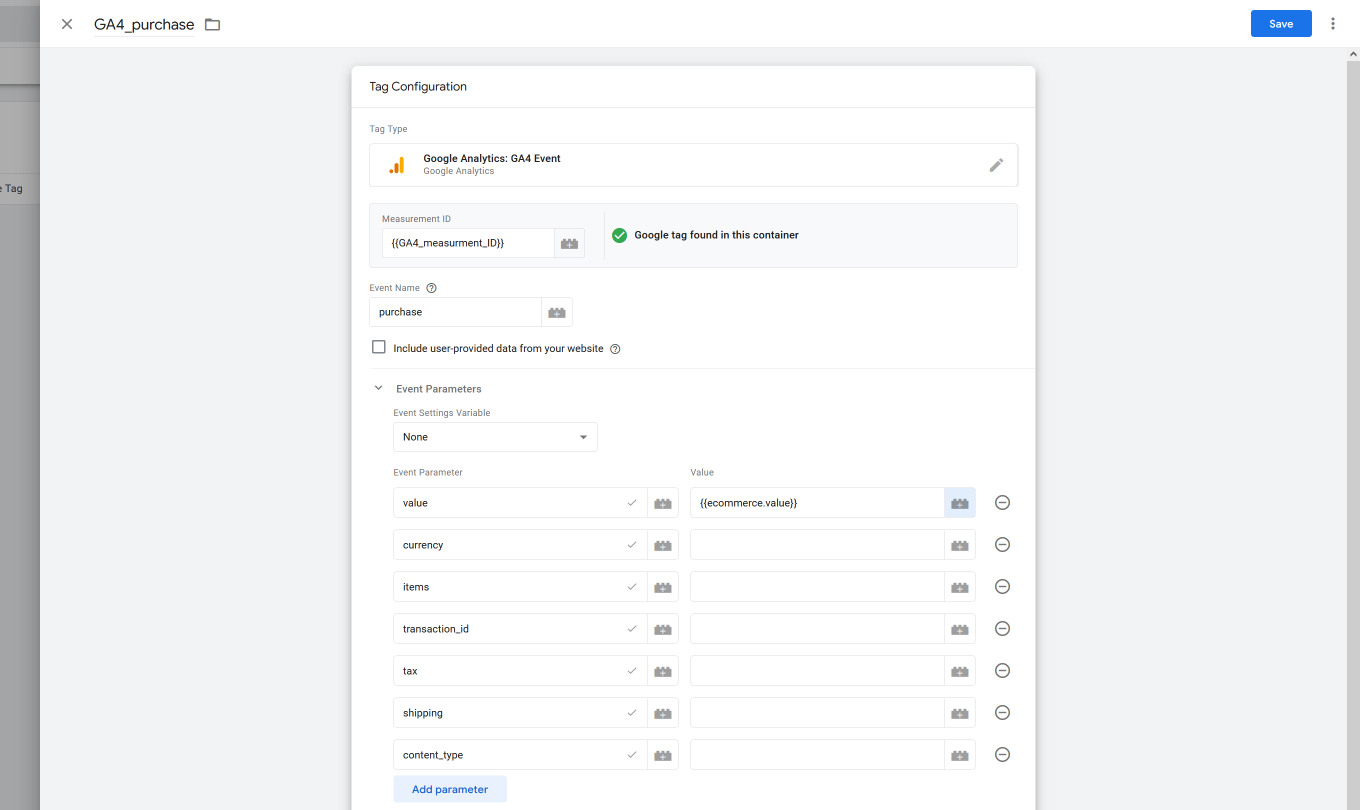
Let's create a purchase tag!
Setting it up may seem complicated at first look, but if you follow the instructions clearly, it will be quick and easy. Once we set up this tag, we can set up all the other tags very quickly, just using it as a basis.
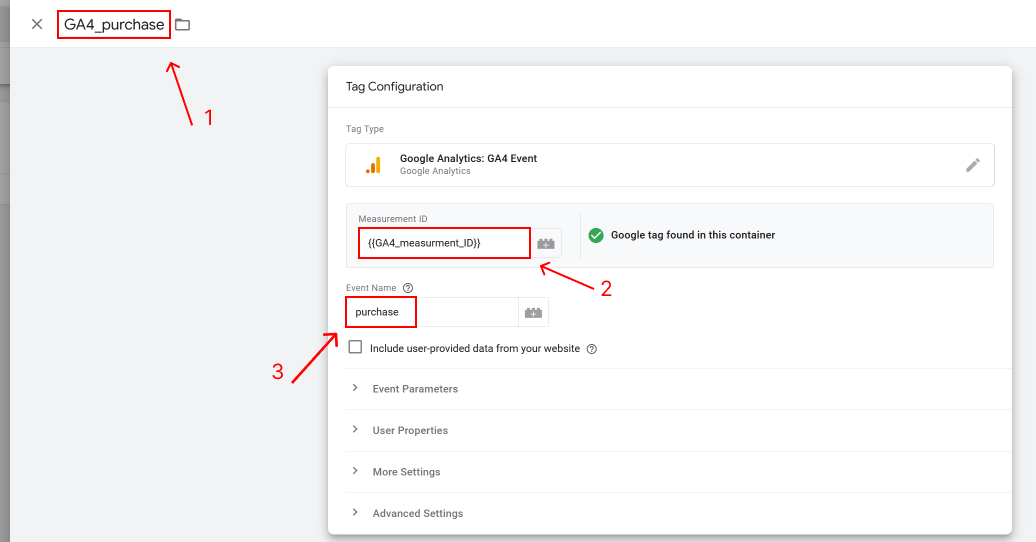
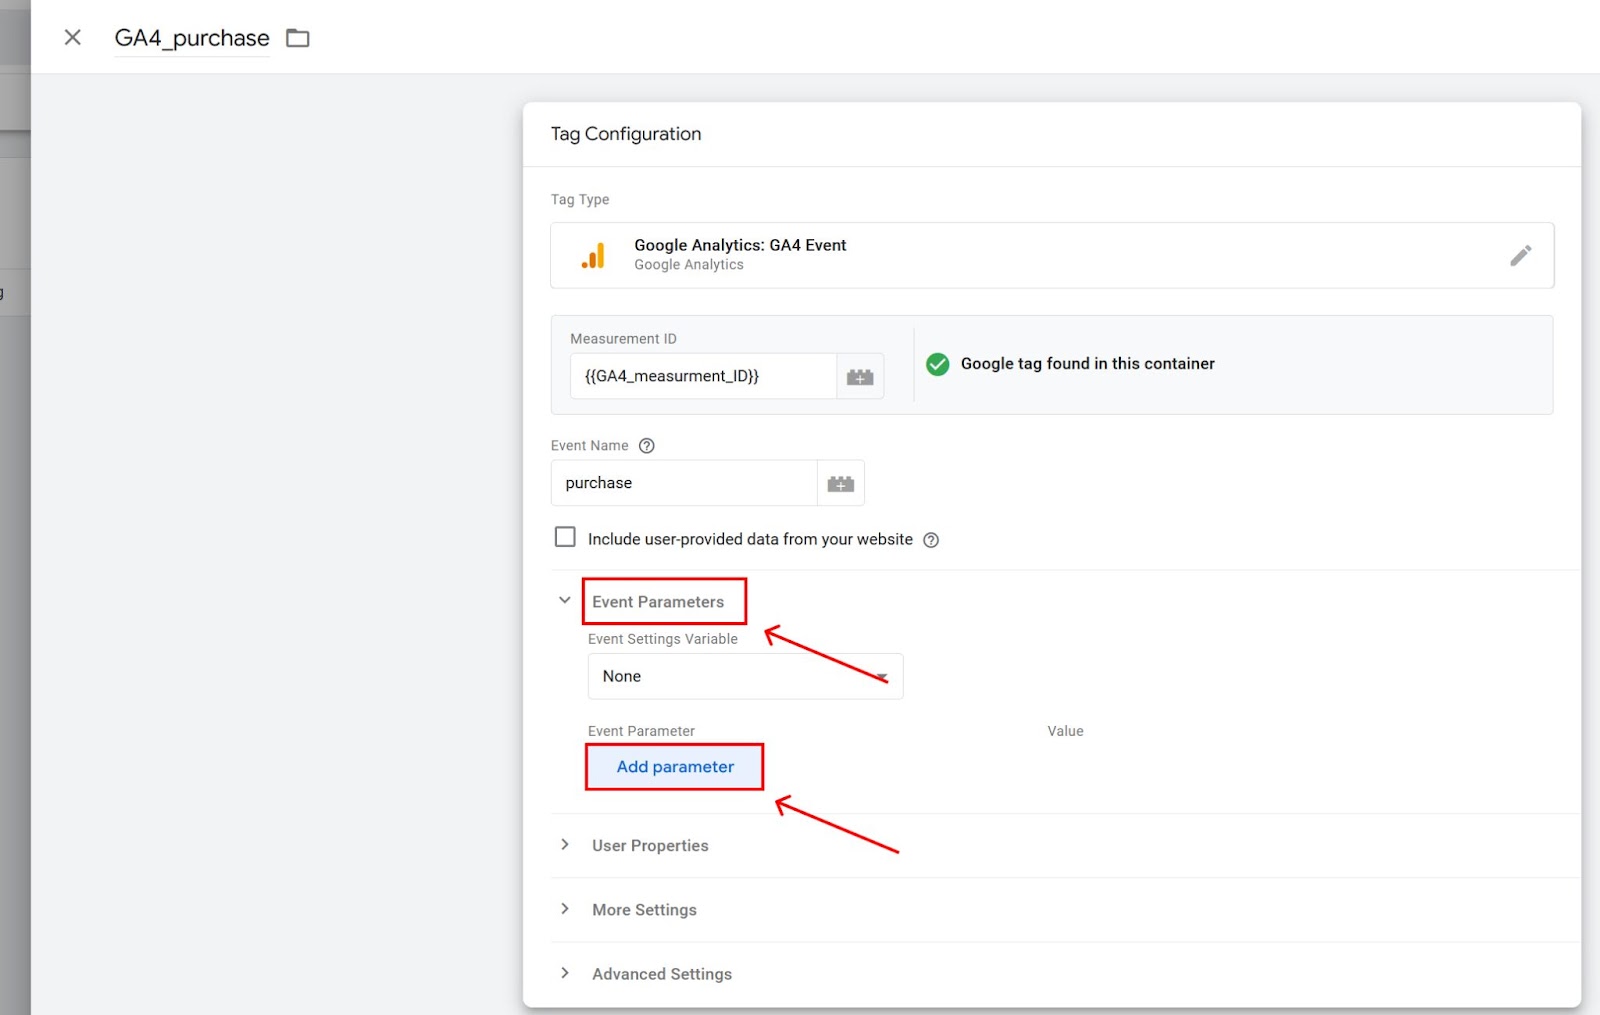
We have created a tag that will send the purchase event to GA4. Now we need to specify which parameters will be sent with this tag.
You will now be working alongside the Tag Assistant window that you didn't close before. If you go back to this window and look at the first transaction_id parameter, you will notice that it is located inside the e-commerce container, this means that the address of this parameter looks like e-commerce.transaction_id.
Similarly, this rule works with other parameters like e-commerce.value, e-commerce.tax, e-commerce.items etc.
In some cases, this container may have a different name, such as eventModel. In this case, you should get eventModel.transaction_id.
Let's set it up!
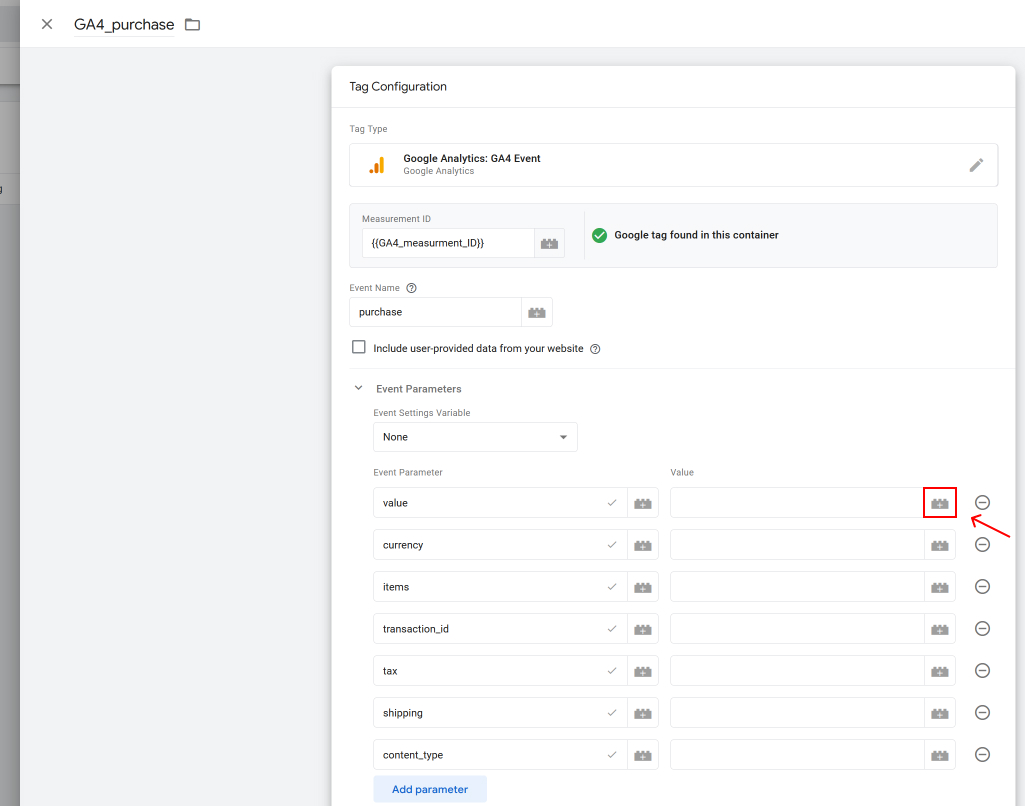

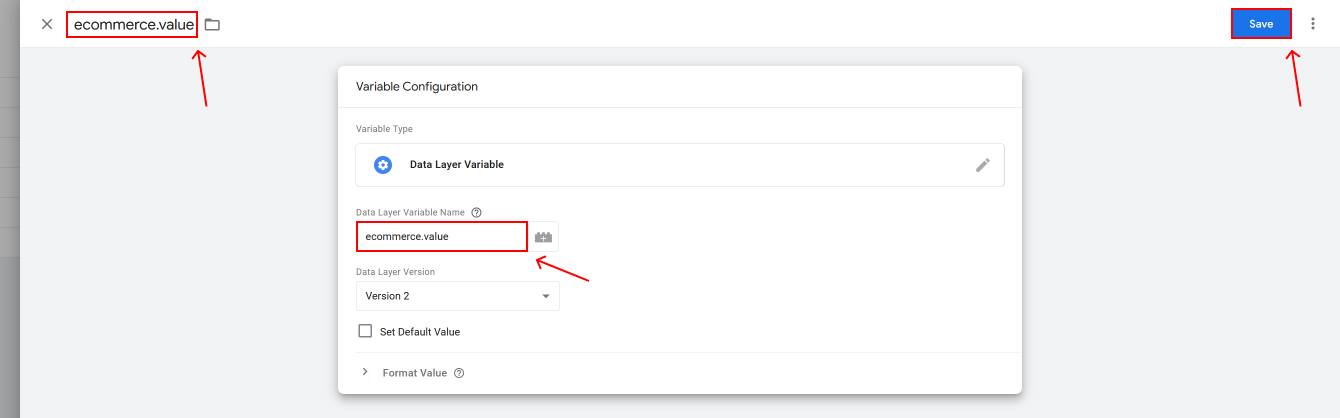
You have now configured the e-commerce.value parameter. Now do exactly the same procedure with the other parameters.

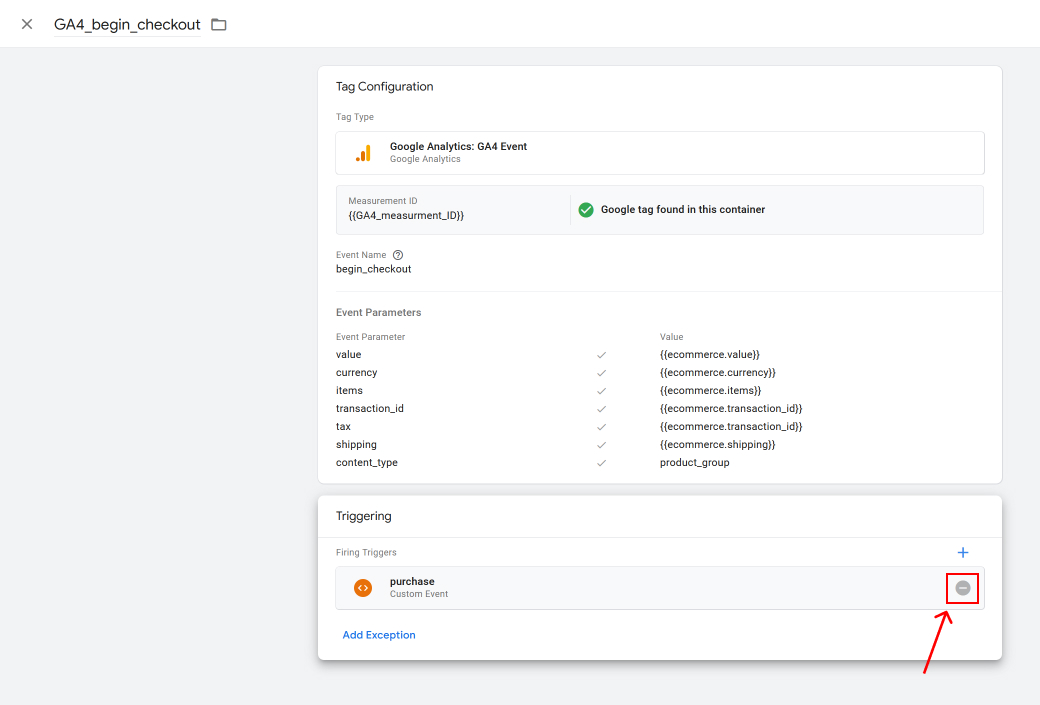
The last parameter is called content_type and it always equals product_group, just add this to the rest of the parameters.
Step 4
That's great! The job is almost done, the only thing left to do is to install the trigger. The trigger will be activated every time the user makes a successful purchase, follow the instructions:


Just now you have created the most important tag, but for the e-commerce funnel this is not enough and you need to set up the rest of the tags.
Now the whole process will go much faster since we already have the foundation in place. Click on the tag you just created and copy it:


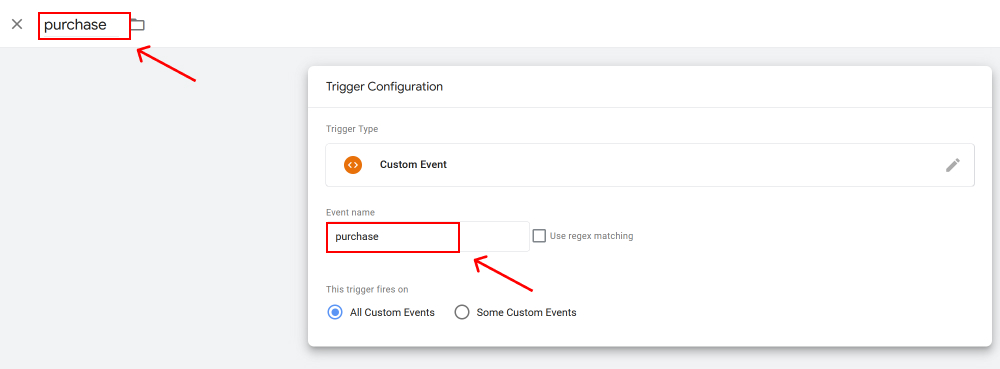
You need to create a new trigger, but you already know the procedure, let's create it:

This trigger will be triggered by the event "checkout", but on different websites this event may be called differently, for example checkout, begin_checkout, initiate_checkout ect.
It is important to understand the exact name and specify it in the trigger configuration, only in this way it will be triggered. You can see the exact name of the event in the list of events in Tag Assistant.

Final test
Congratulations!
The setup has been successfully completed, now we need to run a final test.
Step 1
Close the Tag Assistance window and reopen it using the Preview button. Make a test purchase again, doing the same steps to add the item to your basket that you did before. In Tag Assistant, you will see that the tags you just configured are successfully working:


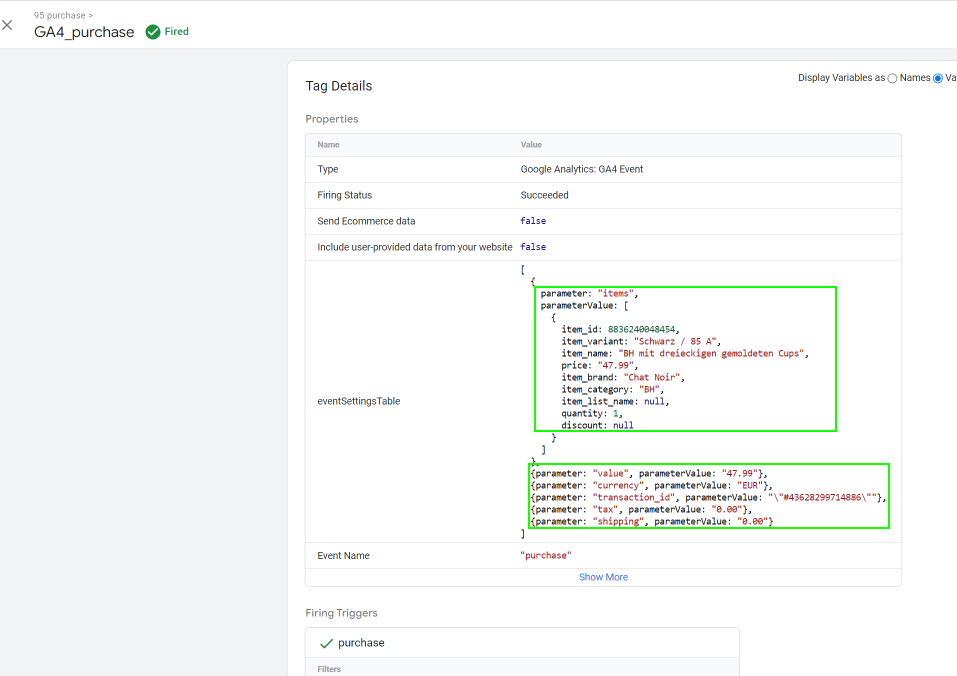
If you click on the Purchase tag, you'll see the data it transferred:
Step 2
The only thing left to do is to publish the container:

You have successfully configured e-commerce funnel event tracking tags for Google Analytics 4 in Google Tag Manager. GA4 will receive these events and you will be able to customize detailed reports based on them.
If you want to make sure that the GTM setup for GA4 is working, then while you make your final test purchase, open the DebugView mode in GA4, which you can find in the Admin menu. In this mode you will see in real time that GA4 receives exactly your test events.
After publishing changes to GTM, real events may arrive in GA4 up to 48 hours late.
You will only need to return to GTM to configure other resources such as Google Ads, Meta Pixel, TikTok Pixel ect.
You can set up tags on your own, but practice shows that along the way you are likely to encounter a lot of problems and nuances that can negatively affect analytics reports or the e-commerce funnel as a whole. In these cases, I always advise you to contact specialists who can solve these problems quickly and efficiently.
.png)


